What is an Overlocker? – Overlocker Machines Explained

What does an overlocker do?

Toyota-SL3335-Overlocker

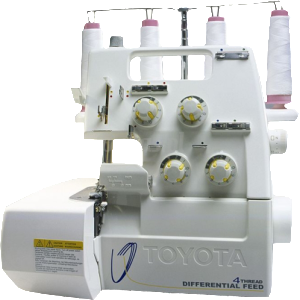
In a nutshell, an overlocker is a sewing machine that stitches with either 3, 4 or 5 threads at the same time. They are mainly used to join seams, trim off the excess fabric and stop the cut edges from fraying all in one simple operation.

Pictured to the right is a Toyota SL3335 Overlocker
. read more

How to make lined curtains – Step 7b of our Guide to Making Curtains

So after completing steps 1 to 6 we find ourselves here at step 7b. That is of course, if you opted to make lined curtains.

If your here and you haven’t completed the previous steps, click HERE to start at the beginning 🙂

Ok… for the rest of us, let’s get on with making lined curtains.

Sorting out the lining fabric to make lined curtains

Obviously, since we are about to make lined curtains, we need to prepare the lining fabric. This is almost like making unlined curtains but without the side hems and header tape. Now, with that in mind, and to save me having to rewrite the processes covered previously, simply follow steps 4, 5 and 6. This time though, you’ll be working with your lining fabric.

WAIT!!!… Just before you rush off to get started on that, there is one important difference.

For our example, I decided to make lined curtains that are 182cm(72″) wide and have prepared the face / curtain fabric accordingly. Remember in step 4 we added the extra 4″ for side hems and 2″ for joining?

Well this time, with the lining fabric, you only need to add a total of 3″. So we need the 72″, +2″ for joining the lining together and +1″ to join lining to the face fabric. That’s a total width of 75″. So the extra lining needed to make up the correct width in this case is 75″ – 54″ = 21″. Oh… and when sewing the lining together, stitch 1″ in from the edge.

Ok… you can carry on now. Once your lining is joined and hemmed along the bottom, we can join it to the face fabric.

Joining the lining and face fabric to make lined curtains

With your lining fabric prepared, we will just do a quick check.

  • First measure the total width of your face / curtain fabric. For our example curtains the measurement is 76″
  • Then measure the total width of your lining fabric. Again, for our example curtains the measurement is 73″.
  • read more

    How to make unlined curtains – Step 7a of our Guide to Making Curtains

    Ah… so in step 1, you opted to make unlined curtains.

    If your a little confused by that statement, you may have just landed here from Google, Yahoo or Bing (or somewhere else), looking for How to make unlined curtains. Well… your almost in the right place – Click here for step one

    Right then… with that out of the way, lets get on with making unlined curtains. 🙂

    Hemming the sides of your fabric to make unlined curtains

    Since unlined curtains have no linings, (that would just be daft now wouldn’t it? – and they’d be lined curtains), all we need to do is hem the sides in a similar fashion to how we did step 6.

    Taking one of your ‘almost curtains’, lay it face down on your chosen flat surface with one of the sides closest to you. Now, as we did during step 6, work your way from one end to the other folding and pinning to create ‘crease one’. This time though, you only need to fold in about 2″ (5cm).

    Then, work from one end to the other again, tucking the salvage edge under and down in to crease 1. Again, smooth out the new crease as you go, and move the pin from crease 1 to the new one (crease 2). Remember when moving the pins, to be sure the pin goes through all three layers of fabric. The end result should be a 1″ (2.5cm) hem down one side. Next, turn your ‘almost curtain’ around and repeat the process on the other edge.

    Now you can sew your side hems removing the pins as you go. WAIT!… before you rush ahead and do that…

    Are you feeling up to having a little extra creative flare?… yes?

    OK, here’s what we’ll do. When sewing the section of side hem that over laps the 3″ bottom one, tuck the last 1″ (2.5cm) corner bit under to create a third crease at a 45 degree angle. This third crease should be running from crease 2 down to bottom corner of your ‘almost curtain’ to meet crease one. Basically, you should of just tucked under a little triangle bit of the side hem at the bottom.

    If, on the other hand, you can’t muster up the extra bit of creative flare, that’s fine. When you make unlined curtains, that bit is optional. Instead you simply just sew the side hems without the third crease.

    Yeay… that’s one ready for the header tape. Now do the same to you other almost curtain.

    Wow, who know it would be so easy to make unlined curtains! 🙂

    Next – Step 8: The Final step – adding curtain tape.

    Hemming – Step 6 of our How to make Curtains guide

    To those who may have landed here looking for a guide to hemming ready made curtains. This page contains part of our guide to making curtains from scratch. Please take a look at our guide ‘How to shorten curtains the easy way‘ instead.

    Step 6: Hemming

    Hemming… a relatively straight forward stage of making curtains. There are a couple things to consider though.

    1. What size hem would you like?
    2. Which type of stitching will you choose?

    What size hem?

    The ‘Norm’ if you like, would be to have a 3 inch (7.5cm) hem. However if you are making curtains that are quite large or long, you may find that a 4 inch (10cm) hem gives proportionately better appearance. Or, if your curtains are going to be quite short, hemming them with a 2 inch (5cm) hem would be sufficient. However for the sake of this guide, we will be sticking with the norm, and hemming our curtains with a 3 inch (7.5cm) hem.

    Assuming you followed step 3 and made use of our Curtain fabric calculator, you should have a 6 inch (15cm) allowance for the bottom hem.

    So, taking one of the pieces of fabric we joined in step 5, lay it out face down with the bottom closest to you. Now, working your way from one side to the other, fold up 6 inches (15cm). Smooth out the fold as you go and place a pin at reasonable intervals as close to the crease as possible. This crease (crease 1), will be the bottom of your curtain.

    (If you wish, you can place the pin further up and iron the crease. Personally I find this much more time consuming and not really necessary.)

    Next, working from side to side again, tuck the cut edge under and down in to crease 1. Again, smooth out the new crease as you go, and move the pin from crease 1 to the new one (crease 2). When moving the pins, be sure the pin goes through all three layers of fabric.

    Right, that’s one ready for sewing. I imagine you can guess what I’m going to say next… Yeap!… Now do the same to the other piece of fabric. 🙂

    Which stitch?

    What do you mean – which stitch?

    Well, when I’m hemming curtains for our customers, some request that I do a ‘Blind hem‘. This type of stitch is used when you don’t what to see a row of stitches on the face of your fabric. Blind hemming can be done by hand or many sewing machines also have this function.

    Other customers don’t mind if you can see a row of stitches on the front of their curtains. Like me, they often comment.. “Who goes around inspecting the bottom of your curtains!”.

    Once you have decided which stitch to use for hemming your curtains, please feel free to sew along close to crease 2 on both of your ‘almost curtains’. You can remove the pins as you go.

    That’s the hemming done 🙂

    What’s next?

    What we do next depends on your answer to step 1.

  • If your making unlined curtains – next will be Step 7a: How to make unlined curtains.
  • If you are making lined curtains – next will be Step 7b: How to make lined curtains.
  • read more

    How to make Curtains Step 5: Joining Fabric

    Just before we start joining fabric, here is a quick check list…

    So far in our ‘How to make curtains guide‘, we have completed these steps:

    Step 1: Decide what type of curtains would you like to make.
    Step 2: Work out what size curtains you need.
    Step 3: Calculate how much curtain fabric is required.
    Step 4: Cutting your fabric to the correct length.

    Now, continuing on from ‘What about the Curtain width’ in Step 4, we are going to be joining fabric to make curtains wider than the 137cm(54″) fabric we are using for our guide.

    Step 5: Joining fabric.

    For those of you who are making curtains that are narrower than a single width of your chosen curtain fabric, please skip to Step 6. For the rest of us, it’s time to get those pins out.

    Joining fabric to make plain curtains: read more

    Making Curtains Step 4: Cutting your fabric to the correct length.

    Welcome to step 4 of our guide to making curtains. For those of you who have been following, please read on.

    On the other hand, if you have managed to land here from afar, you may want to check out  Steps 1-3 to find out what we did first!

    Step 4: Cutting your fabric to the correct length.

    First, unfold your fabric on to a flat surface. Obviously, if you are making curtains that are quite long, you may not be able to unfold the whole length. Don’t worry, just unfold as much as you can. Next, we need to make sure that the cut end is a straight cut. If not you will need to cut off as little as possible to straighten it up.

    Now this next bit is where things differ depending on whether you have chosen plain fabric, or patterned fabric, to make curtains with.

    Making Curtains with Plain Fabric:

    Measure down the side of your fabric. When you reach the finished length you require for your curtains, put a pin at the edge. Now add another 8 inches (20 cms) and put another pin at the edge. (This extra measurement is for the top and bottom hems). Now, Double Check your measurements! 🙂  Once you are happy that you have measured correctly, cut straight across the width of fabric just after the second pin, and remove both pins. Right… that’s one piece done. Now… do that again… and again until you have the correct number of widths required to make curtains the size you need.

    Making curtains with Patterned Fabric:

    If you are making curtains from a patterned curtain fabric, it’s recommended that you do something called ‘Pattern matching’. Basically, this means that we need to ensure the pattern will line up when we join two lengths together. The process for cutting patterned curtain fabric is similar to plain, except we need to allow for the pattern repeat.

    So first, take note of what the pattern looks like along the top cut edge of your fabric. Now, as with plain fabric, measure down the side of your fabric. When you reach the finished length you require for your curtains, put a pin at the edge. Now add another 8 inches (20 cms) and put another pin at the edge. Next, we need to look below the second pin to find the point in the pattern that matches the top cut edge. This can be a little tricky depending on the pattern so be sure to find the correct point. When you find it, put another pin at that point. The fabric between the second and third pins can now be removed.

    Now, the pattern along your new ‘top edge’ should be identical to the one along the cut edge you started with. It is?… Great… Now remove the pins and repeat that process until you have enough widths required to make curtains the size you need.

    That’s it, your fabric should now be cut to the correct length. If you are making curtains with linings, simply follow the ‘Making curtains with plain fabric’ part above to cut your lining fabric to the correct length.

    What about the curtain width?

    That’s a good question. Many curtains may be wider than one width of width of fabric, but not as wide as two. For example if you are making curtains that are 182cm(72″) wide. This would take approximately one and half widths of 137cm(54″) wide fabric.

    The good news is that we don’t really need to be quite so fussy here. The odd few extra centimetres or inches, won’t make a very big difference to the gather of your finished curtains. That said though, we do need to ensure we have enough extra width in our fabric to join it and allow for hemming the sides.

    For the rest of this ‘How to make curtains guide‘ we will stay with our example above. We will be making curtains that are approximately 182cm(72″) wide and we will be using 137cm(54″) wide fabric.Now obviously one width of curtain fabric isn’t going to do the job. As mentioned above it will take about one and a half widths. Here’s how to work out how much extra fabric we will need.

    First we take our 72 inches and add the extra measurements we will need for joining and side hems. So that’s 72 + 4 inches for side hems + 2 inches (1 inch per piece of fabric) for joining purposes. That gives us with a total width of 78 inches. Now simply deduct 54 (one width of fabric) from 78. Therefore we need an extra 24 inches in order to make a curtain that is 72 inches wide.

    Personally, I wouldn’t be too fussy. I would just cut one length of fabric down the middle giving me a piece 27 inches wide. As mentioned earlier, making curtains a few inches wider will make very little difference to the gather of your curtain. Also it saves a little time having to cut down the length of your fabric twice (once for each curtain you make).

    Next – Step 5: Joining your curtain fabric.
    How to make Curtains – Easy step by step guide

    Can you tell me how to make curtains?

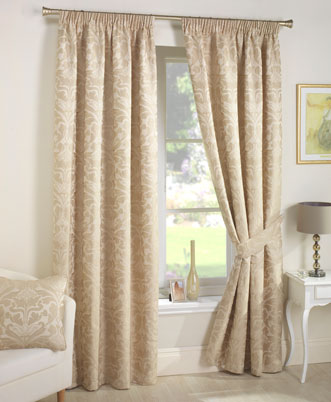
    How to make curtains like this - Pic of ready made curtains at Terry's fabricsYes! of course we can. In fact we would be happy to tell you how to make curtains. However, the answer to this question is not quite so simple.

    Unfortunately we can’t simply jump in and say “Fold this, pin that and stitch there… job done!”. That would be silly. This is mainly because, when you make curtains, there are different types and styles of curtains to choose from. Before we can tell you how to make curtains, we need to know
    that you have completed the first three steps to making any type of curtain.

    Step 1: Decide what type of curtains would you like to make.

    Here I think would be a good place to include a brief definition of the basic types of curtains. We won’t worry about the type of top finish for now, just the three basic types of curtains:

    Unlined Curtains:  A single layer of fabric hemmed at the sides and bottom with choice of top finish. Tab top, Ring top, Rufflet etc

    Lined Curtains: Similar to above but with an extra layer of fabric. A backing fabric usually of a plain cream or white cotton or satin.

    Interlined Curtains: Basically the same as lined curtains except they have an extra lining between the face fabric and the curtain lining. This extra lining is called Bump and is kind of a blanket type fabric.

    Step 2: Work out what size curtains you need. read more