So here we are then – The Final Step of curtain making. Unless that is, you happen to be making Tab-top curtains, in which case, reading this step would be completely pointless.
(If your lost Step 1 is over HERE)
For the rest of you curtain making readers, who are itching to get that curtain tape attached to your almost curtains, grab your cuppa and read on.
Curtain Making with Curtain tape (header tape / Ruflette)
Adding the curtain tape to your almost curtains is relatively simple. In fact, as I mentioned to Laura Here, it is the same process that we use in our guide – How to Shorten Curtains the easy way.
Here are the basic steps:
- First, we take one of our almost curtains, fold it in half length ways, and lay it on our flat surface.
- Measure along the side from the bottom corner towards the top, put a pin in both edges at your required length.

- Next, we open out our almost curtain and lay it out flat with the face fabric down.
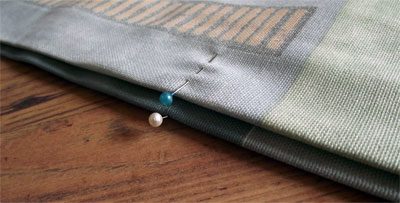
- Fold the top down so that the crease is level with the pins.
- Work your way along the crease pinning all the layers of fabric together.
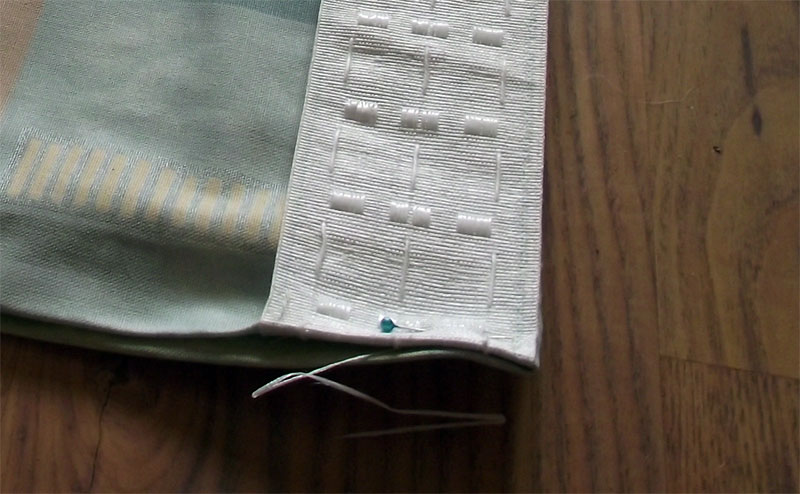
- Taking your curtain tape, tuck 1.5 to 2″ between the layers at one end and pin in place.

- Work your way along the crease, pulling your curtain fabric and curtain tape tight as you go, removing each pin and replacing it to attach the curtain tape. When you reach the other end, trim the curtain tape off allowing 1.5 to 2″ to tuck in as you did at the start.
- Sew along the top of the curtain tape about quarter inch in from the edge.
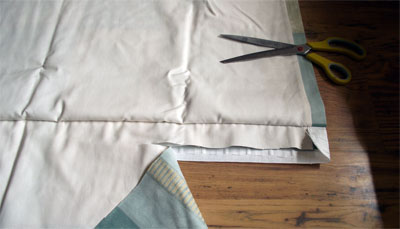
- Trim any fabric protruding from the bottom edge of the curtain tape.

- Stitch along the bottom edge of the curtain tape and snip off the excess thread.
- Important! – At one end of your curtain tape, pull out the ends of the gather strings and tie them together. Then do the same to the other end.
- Optional – Make a cuppa, relax and admire your handy work 😉
That’s it! – you’ve just converted one of your almost curtains in to a fully fledged Curtain… Congratulations!
Now, if you’ve finished your cuppa, feel free to get on with the other one 🙂

I used your instructions to make my first ‘proper’ curtains – 4m wide bay window, 2.5m drop and lined. You were a fantastic help – found the pattern matching a challenge, but that was due to the pattern not your explanation. Many many thanks!
No problem Louise, happy we could help 🙂
I just had to thank you for your really clear and easy to follow instructions. I have just made my first curtains, well curtain actually, for the front door, and you made it so simple, thank you.
Thank you Kate, Glad I could help
Loved your clear, easy to follow instructions and photos – brilliant for an incompetent seamstress. Have managed to make 3 matching pairs of lined, patterned curtains without any mistakes. Many thanks!
Can’t thank you enough. Never made lined curtains…. Until now! My huge bay window is now framed thanks to your simple, clear instructions. The sense of humour helped too when I was getting a bit stressed.
Please keep publishing.
Hi Rachel, Thank you for your kind words. I’m glad you found our curtain making tutorial so useful 🙂
Just finished making my curtains using your instructions. They are lined and the material was so… expensive and a nightmare to work with but your easy to follow guide gave me the confidence to carry on one step at a time so I didn’t get over whelmed. Thank you so much I am really proud of myself
Thank you Theresa and congratulations. You should feel proud of yourself and I hope you enjoy your new curtains for many years to come 🙂
Thank you so much for your instructions! Clear and easy to follow, you even gave me the confidence to go ‘off piste’ and sew in eyelet tape with no instructions come the end!!
Thanks! Helen
Woohoo! Just made my first ever curtains using your guide. 2 sets of house curtains and a set for the campervan. They’re not perfect but they work for me and I couldn’t have done it without you. Thank you! 🙂
Forgot to mention, they’re all lined!
Congratulations Suzanne, I’m glad you found our guide helpful.
Thank you so much. Easy to follow instructions. My first time curtains look fantastic. Do you have a guide on how to make tiebacks please? X
Hi Karen – Thanks for the feedback. I am hoping to post a tutorial for tiebacks in the next few weeks.
Thanks to your thorough steps and brilliant calculator, I am the owner of a brand new pair of curtains. Simply delighted with how they’ve turned out!
This is not the first time I’ve made curtains, in fact I’ve made quite a few pairs. However, I always get into some sort of mess, especially with the bottoms. My hems were always a bit messy and I would sort of give up on joining the lining. These instructions have allowed me to make a truly professional pair of curtains. Thank you so much!
Hi! I have read through all the steps before starting (unlined curtains) and have got to the end where you instruct how to sew the curtain tape, I am a. It confused! Which I am sure is not to do with how you have written but just my incompetence. The bit about folding the curtain in half length ways and then pinning. I don’t understand this bit! Why do we fold it in half length ways (top to bottom? Or side to side?)
Thank you!!
Hi Katie, you fold the curtain in half length ways (so as the two sides are together), then measure up from the bottom and place your pins. This is to ensure that the finished curtain is the same length on both sides.
I hope this clears things up for you.
Thank you for your clear and easy to understand instructions. I have managed to make a pair of perfectly pattern matched and equal hem length vurtains for my daughter’s bedroom. Am so proud of them but wouldn’t have done as good a job without your guidance